As I discussed earlier, the directions for installing this vise strongly urge you to follow them exactly and precisely. Suitably intimidated, I began by drilling the 1 1/2" holes in the front and rear jaws, which in my case are 26"x7". Be aware that the minimum jaw depth is the thickness of your bench top plus 4 1/8", which will give you a throat depth of the thickness of your bench top plus 1". I made my jaws deeper than the minimum so I could have a little more than 3" of clearance.
The screws can be a maximum of 16 7/8" apart on center for the standard vise, which seemed fine for my 26" wide bench. This is where I dodged a bullet. The vise screws ended up clearing the insides of the 4" thick legs of my bench by 1/16"! "What do you not understand about the term 'on center'?" I muttered to myself when I realized what had happened. My point in revealing this lapse is that you should be more careful than I was in determining clearances unless you can depend on being similarly lucky and that you may not be able to get the full width between the screws if you mount it as an end vise, depending on the width of your bench and the thickness and location of its legs.
Great emphasis is placed on making sure that the holes for the screws are precisely aligned and parallel through careful use of a drill press. I added the extra precaution of using double stick tape to make sure that the jaws didn't move relative to one another as I drilled through both at once.
Next you drill holes in the rear jaw for the steel pins that keep work pieces from coming into contact with the screws. Slightly larger clearance holes for the pins are drilled in the front jaw. Four bed bolts are supplied to mount the rear jaw to the bench and I chose to drill holes and counterbores for them on the drill press at the same time. The Nicholson bench makes for a very strong connection as I placed two of these bolts in the top and one near the bottom of the jaw into each skirt.
After you drill the holes in the bench for the mounting bolts, you have to locate and drill a perpendicular hole for the round nuts. They tell you how to make an ingenious jig to do this easily which works very well:
The challenge I had was there wasn't any way for me to reach these holes with the rear jaw in place. I solved this problem by installing the round nuts and holding them in place with wadded-up paper and blue tape while I threaded the bolts into them. Fortunately, this worked.
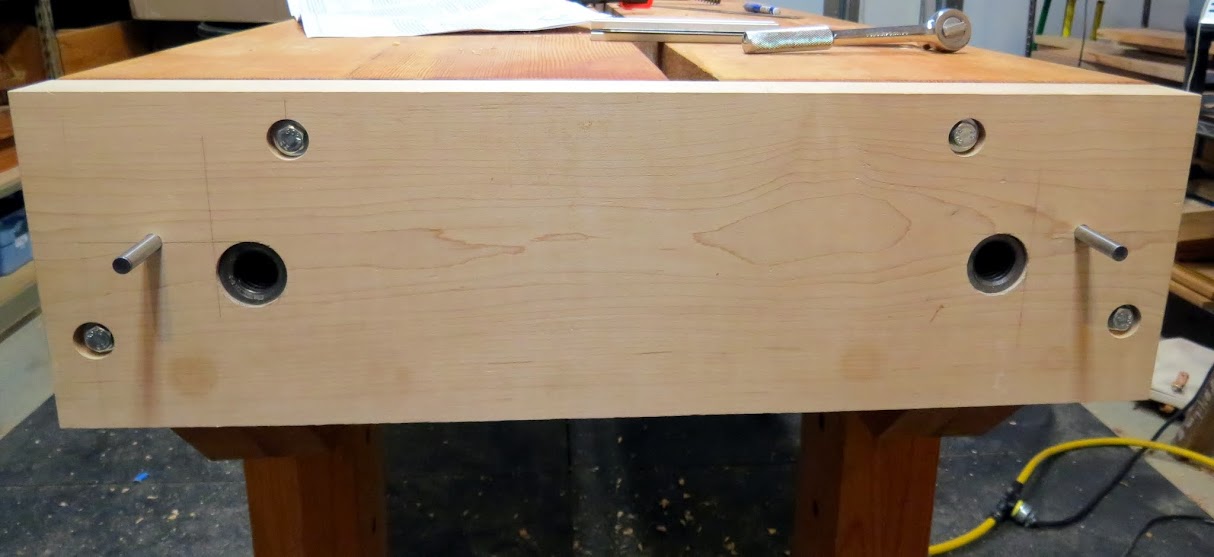
Notice two other things. I had to drill clearance holes through the nearest transverse bearer to accommodate the vise screws. Second, notice the ledgers on which the bearer sits, which is glued and screwed on the bottom of the skirts. I decided to take advantage of this by adding a piece to the rear jaw to sit on them:
Here is the rear jaw installed:
You then mount the thrust plates and screws to the front jaw and connect the chain:
The final step is to install the front cover and handles:
Careful attention to the directions paid off because the vise operates very smoothly. It is extremely powerful and easy to operate. I have used it a limited amount so far and really like it, but only time will tell whether mounting it as an end vise was the right decision. Guess I could buy a second one and mount it on the skirt!


I installed two of these on a large workbench. As I squared the workbench ends, I kept the crosscut pieces of it. Before I finished the 1-3/4" thick hard Maple jaws with Waterlox, a wipe on finish, I cut a 3/8" deep dado/groove on the top edges of both jaws. I took the bench top end cut-offs and cut a 3/8" thick section and inlaid one in each jaw so the pattern of the Walnut and Maple lumber matched the bench tops. The end grain makes the top edges of both jaws very resistant to dents and dings. Don't know how you post visitor pics, but would post two or three so you could see.
ReplyDeleteNice job on your vise and with the pics showing how yours went together.