
My test joints turned out well enough that I decided to go ahead and finish the drawer, which I will find a use for at some point. I did find that very careful fine-tuning made a difference but some small gaps remained. I used a filler of glue and sawdust to fill the gaps and this is what I ended up with:


Pretty good, could be better. The best way I have found to fill small gaps in dovetails is sawdust and shellac and that's what I will go back to in the future.
Here's how I think I can improve:
- I need to make further progress on precise, crisp marking out of the pin board but in a way that produces a line I can follow;
- Although I have made significant strides, there is always room for further improvement in sawing technique.
I decided that I would try to use a marking knife but then find some way to highlight the knife line so I can see it. After a number of unsuccessful experiments, I settled on putting a chisel in the knife line and drawing a line with a .5 mm mechanical pencil along the back of it. Here's what it looks like under magnification:

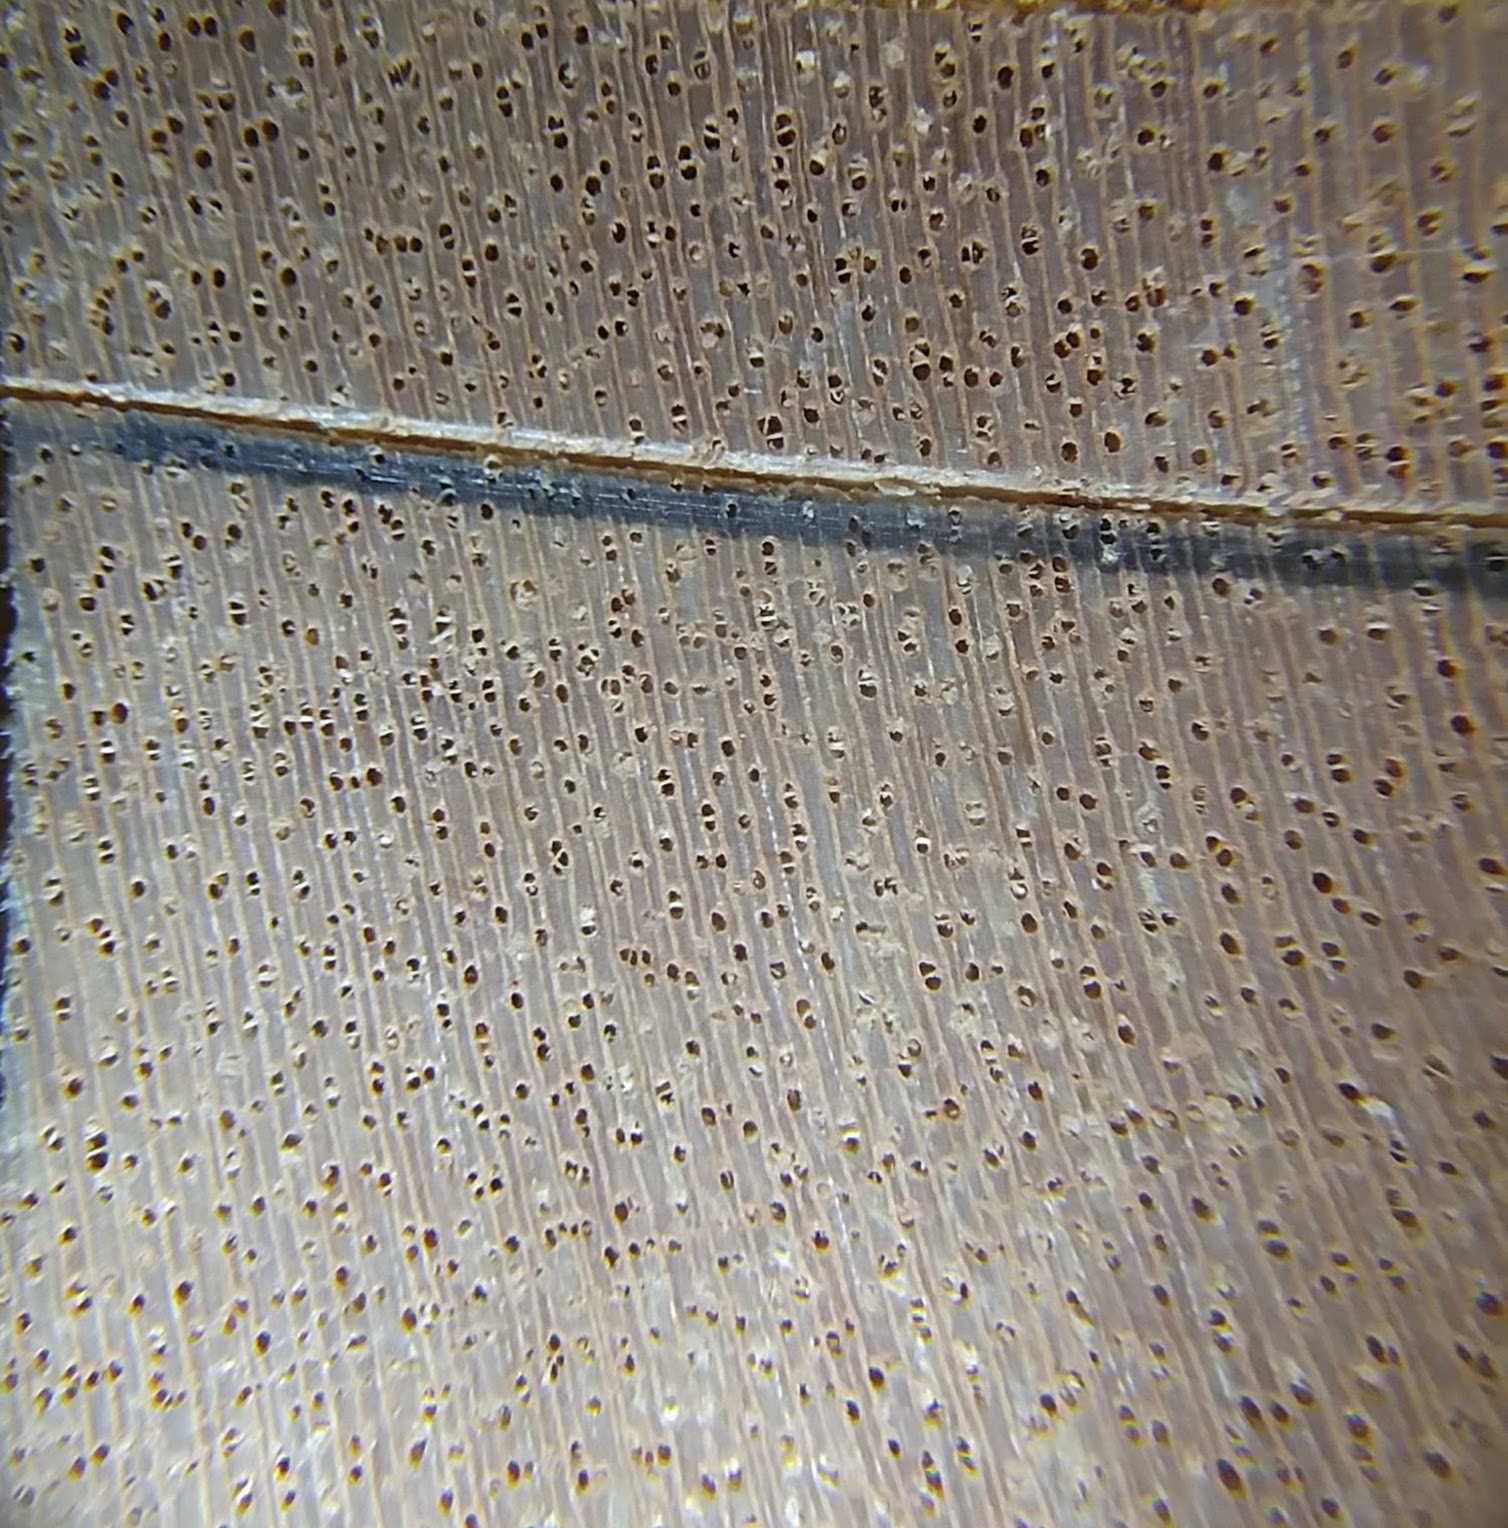
After all of the fumbling around marking out dovetail pins that I have done, this simple and obvious solution seems like it is going to work. I think it is better than the masking tape trick or any other method I know of. Quicker too.
Here's the result:

This is dry fit off the saw and chisel and is a significant improvement. Further improvement depends on sawing accuracy, so this is what I am focused on.
I ran out of wide scraps, so I had to start making shallower drawers:

If I could make them this well on a consistent basis, I'd be satisfied.
Now I have two wide drawers and two shallow drawers and nothing to put them in. May have to think of a project.

That magnified photo is a FANTASTIC picture! I've been using a knife to transfer my tail outline to the pin board end grain. Then I typically pencil in the knife line. I once read something Schwarz wrote about doing it this way. He noted that the pencil line will darken both sides of the mini-canyon created by the knife line. Then he saws to remove the half the pencil line that is on the waste side. I recently did this with some success. But it was in pine, where I can easily see the pencil lines. I'm about to try it in red oak. Could be more difficult to see.
ReplyDeleteMatt,
ReplyDeleteI tried that and was getting a slight gap. I don't know if this makes sense, but it seems like if you saw into the knife line you will be slightly cutting into the pin. In any case, I find it easier to saw to the edge of the pencil line than trying to split it. Just personal preference.
Your side board cuts look 'fuzzy' like maybe you are using pine or softwood. Try poplar, I've been practicing with dovetails in poplar a lot and it gives a nice cut with no fuzz. I've tried rubbing white chalk into knife lines in darker wood with good success. Those stress cracks bothered me for a lot of my early dovetail drawers, you can relieve the tails' wood with a chisel inside the joint where you won't see it and they will stop. Practice.
ReplyDeleteI am using scrap douglas-fir for the sides. It is fuzzy and is also prone to small splits along the corners but I would like to use it if possible. I looked at poplar at my supplier but it was a green color I didn't like.
ReplyDelete